

A new roof is a significant investment. But it’s also one of the best ways to protect your home from damage, deterioration, and costly repairs.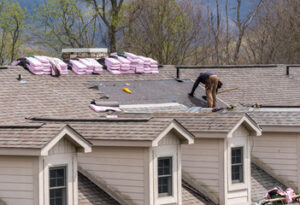
The roof installation process involves many different steps. Following your roofing contractor’s preparation instructions (such as removing wall decor and covering fragile items) is important. This will ensure that your roof gets installed correctly and is protected. Visit https://redstickroofing.com/baton-rouge to learn more.
The first step in a proper roof installation is to remove the old one. Some homeowners try to save time and money by skipping this step, but it is essential to ensuring that your new roof will last for years to come. It also allows your roofing contractor to check for any underlying damage that may need to be addressed, such as leaks or the need for replacement roof decking.
If you’re doing the tear off yourself, prepare for a mess by covering any landscaping around the house with tarps, and renting a trash container for disposing of the debris as it is generated. If you have a lot of bushes or shrubbery around your home, protect them with 2×4 frames and cloth drop cloths, and lean plywood over any windows that might be exposed to falling shingle shards.
Once you’re ready to start, put on your safety gear, including a hard hat, work glasses, and gloves, and begin the process of removing shingles. It’s best to start at the top of the roof, using a shingle fork (or “shingle shovel”) to remove the ridge cap and then working down the rest of the roof, row by row. This is when you’ll want to be especially careful not to tear through the roof decking, as it can be expensive to replace. You should also be sure to keep pets indoors, as hammers and strangers tend to disturb dogs, cats, and even hamsters!
Selecting the Right Materials
Roofing materials can account for up to 40% of your total project cost, so it’s essential to decide which option is best for you. Some things to consider include:
What are the climate conditions where you live? Certain roof materials react differently to extreme weather conditions. For instance, if you live in a hot environment, you’ll want to choose a material that can reflect heat to save on energy bills, while homeowners in snowy areas will need to explore the durability of different options.
Also, pay attention to the maintenance requirements of each material you’re considering. Some require more work to keep them looking their best, while others are relatively low-maintenance.
Asphalt shingles are the most common choice because they’re inexpensive and easy to install. But don’t let this fool you—they’re not the most durable and will likely need replacement sooner than other materials.
Installing the Underlayment
Underlayment is a very important step in any roof installation. It catches and sheds water so that sheathing and framing underneath don’t get damp and rot. It also helps keep the shingles and metal roofing in place. There are many different types of underlayment, including foam, cork, and high-performance acoustic rubber. Most underlayment has a built-in moisture barrier. Foam underlayment is usually the cheapest, while cork and rubber underlayment are more expensive.
Contractors start by laying the underlayment, starting at the bottom of the roof and running it all the way up to the ridge. They may lay an ice and water barrier first, if it isn’t there already, to give the underlayment some added protection.
The underlayment should be rolled out evenly, but not stretched or tight. It should overlap the previous row by about 6 inches, and the seams must be properly sealed. A good sealant for this is roofing cement, but a good tape such as butyl rubber roofing tape will work just fine too.
When laying the underlayment, always follow the manufacturer’s instructions carefully. For example, some manufacturers recommend leaving a gap, about the width of a nickel, between each panel. This allows for expansion and contraction of the underlayment due to weather conditions. Some underlayments also have a printed anti-slip surface for workers to ensure that they aren’t slipping while working on the roof.
Flashing the Valleys
When rainwater pools in the roof valleys, it can seep into the underlying materials and lead to leaks. This can cause serious damage and costly repairs. Metal valley flashing prevents this from happening by directing the rainwater down the roof and away from the shingles.
There are two types of roof valley flashing: open and closed. Open valley flashing consists of V or W-shaped pieces of metal that run down the center of the valley. The sloping roof planes stop a few inches short of this centerline, leaving the valley open to channel water off the roof.
These metal flashing pieces are designed to be durable and long-lasting, protecting the roof from water damage for a very long time. They also offer less friction than shingles, so they won’t wear down as quickly. They can also be painted to match the shingles for a more aesthetically pleasing appearance.
If you’re considering installing open valley flashing, it’s important to get a high-quality product. Look for a minimum 28-gauge galvanized steel flashing that’s corrosion resistant and non-staining. Before you install the flashing, ensure that ice and water protector has been installed along the roof valley and that it has been tacked in place temporarily with asphalt plastic cement. Then, center the first piece of flashing in the roof valley and nail it down carefully, ensuring that the edges are overlapping by at least 6 inches (150 mm). Be sure not to use too many nails as this could increase the risk of leaks.
Capping the Ridge
Your roof’s peak is susceptible to damage, and the ridge cap is vital for safeguarding this area. Without it, moisture would work its way under the shingles or tiles at the peak and into your home. Over time, this could lead to unhealthy mold and mildew, rot, and other issues. Proper ridge capping protects against leaks and extends the life of your roof.
The ridge cap, also known as the roof cap, creates a waterproof barrier over the seam where two sides of your roof meet at the peak. A faulty ridge cap can allow water into your home, causing significant structural and financial damage. Poor installation or improper maintenance are common causes of ridge cap problems.
There are several types of ridge caps, but the most effective ones are made from asphalt shingles. They are durable, weather resistant, and affordable. They’re also highly regarded for their beauty and energy efficiency.
During the roof installation process, professionals use a special mortar mix to secure the ridge cap. However, this traditional method can be messy and expensive. Instead, Rescue My Roof professionals use mechanical clips to fasten the ridge cap. These clips are UV-stabilized and affixed to the ridge tiles or shingle with butyl strips, eliminating the need for mortar. They’re driven with care to ensure that they seat flat on the ridge – crooked screws won’t seal properly.
Installing the Shingles
Once the underlayment is in place and the valley flashing is complete, it’s time to install the shingles. This is a step that requires a high level of precision and attention to detail. If the shingles are installed incorrectly, they can allow water and other weather elements to penetrate the roof and cause damage. It is also important to nail the shingles properly in order to ensure they are secure and wind-resistant.
Start by carefully cleaning the work area. Remove any plant debris or other obstacles that could become tripping hazards. You should also cover any fragile plants with tarps to protect them from dropped tools and nails. Next, check the manufacturer’s recommendations on shingle installation. They’ll have specific instructions for how to line them up with each other and what nails are best to use.
Begin at the eaves and work your way to the ridge, taking care to overlap each row. Be sure to properly stagger the tabs, and always cover any exposed nails with a piece of shingle that is adjacent and over them. Finally, cap the ridge with specialized shingles designed to do so.
Once the shingles are installed, it’s time to perform one final inspection and clean up the work area. This is an excellent opportunity to ensure that there are no shingles that are crooked or missing, that the areas that require flashing are sealed and covered, and that your ridge cap looks seamless.